Hello everyone and welcome to our blog. If you are a fish lover too, you are in the right place. We all are fish and tank lovers and it's time to show it to the world. Sign up in our blog and stay tuned. You can also subscribe in our youtube page or like our facebook one. Everyday new HD/HQ (or even 3D) fish/aquarium [etc.] videos will be uploaded for you to watch. If you have any problems with your tank or fish you can ask for answers to the "Micro-Chat" and you will have immediate answers by experts or other blog-members. Visit our other blog-pages too, for more info.Thank you for reading..
Hello everyone and welcome to our blog. Today i'm gonna show you how to setup a freshwater tank (Aquarium) Step by Step.
First of all you're gonna need an aquarium and something that can "support" it when it's filled with water. Then you will need a filtration system and heater for keeping the water temperature between 20-30°C. You will also need a plant substrate if you want to have a planted aquarium. Don't forget the lighting. Usually most of these items go together as a "pack". Before you buy the fish tank [etc.] you must choose what kind of fish you want to have in it. Not all fish need small aquariums. Most of them need at least a 150 litres (40 gallons) so... choose carefully.
Now it's time for the setup..
Step 1:
Put your tank in place. Clean it carefully from outside and inside. Then add (in the bottom of the tank) the plant substrate (if you want you tank to be planted - i recommend it) and then put the sand to cover the Flourite base.
Step 2:
Place a plate in the bottom of the tank and start filling it with water until the tank is half'-filled. Then add the plants in the aquarium (if you have any), the rocks or anything else you have for the aquarium's decoration.
PS. Plants need light so your Light-lambs must be at least 24 watt.
Step 3:
Fill the tank with water. Clean the water from the leaves that float with your "net". Then Setup your filtration system and the heater according to it's instructions. (I recommend EHEIM or Tetra Ex filtration)
PS. The filtration system must "clean" at least 5 times your tank's litres/gallons. So if your tank is [f.e.] 100 litres, the filtration must clean at least 500 litres per hour.
Step 4:
Add in the tank's water the "Water Conditioner" and the "Micro Organisms" , according to the instructions on the bottle and you are ready to go.
Step 5:
Then, after almost a month, you'll be ready to put fish in your beautifully designed aquarium. I don't think you'll ever leave your house again..
PS. You must wait at least 3-4 weeks before you put fish in, because the water needs time to be "fish-friendly".You must create an environment non-toxic and, as i already said, fish-friendly if you want them to be happy and alive. So until then add the water conditioner and the micro organisms after the water changes and soon enough your fish will be put in place (Do water changes ever 3 days until you put the fish in).
A quick photo-overview
Step 1
Step 2
Step 3
Step 4
Step 5
Thank you for reading..
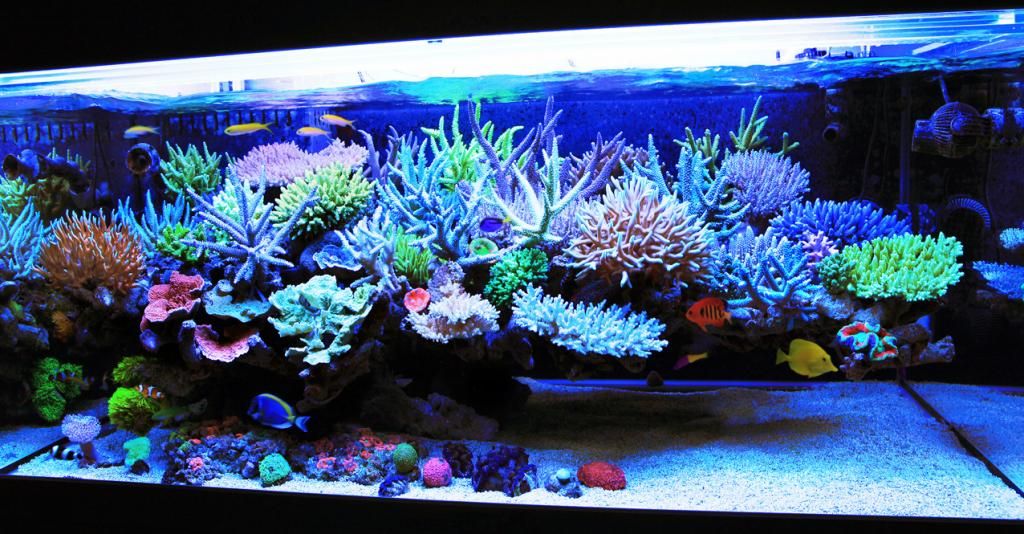
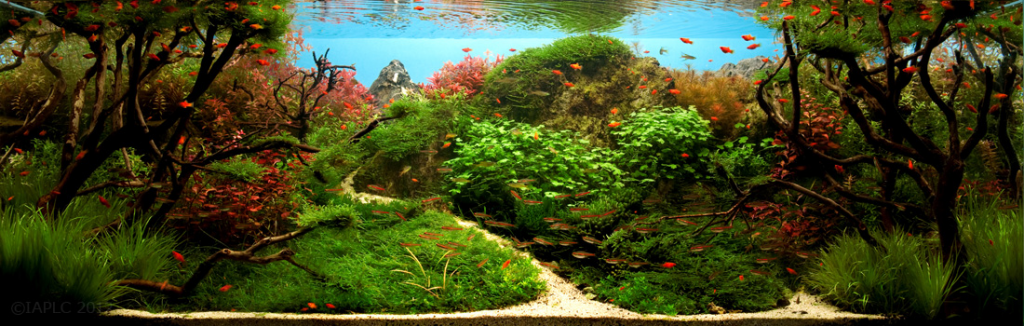
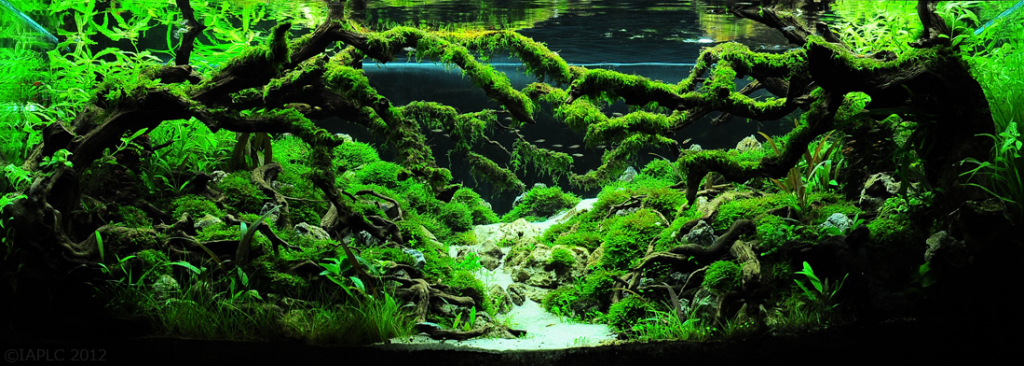
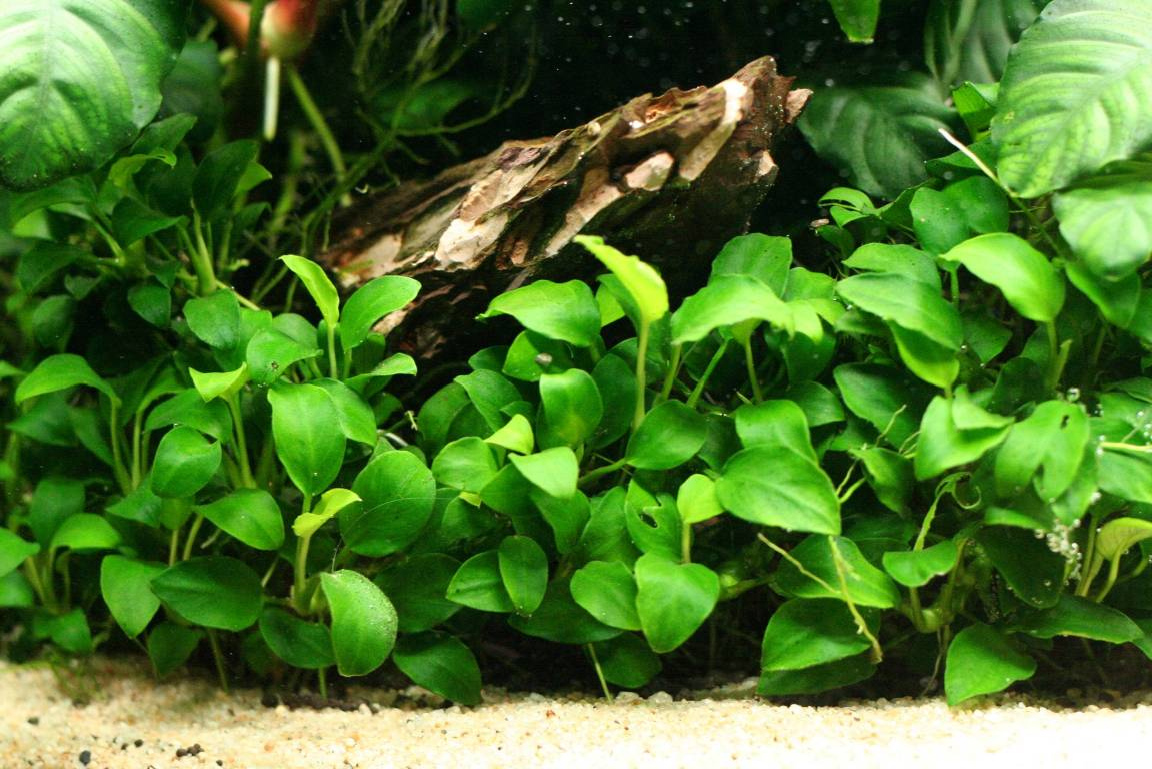
A perfectly Planted Aquarium
_______________________
_______________________
How to Set Up a Salt Water Aquarium
Step By Step
Select the area of the house where you want the tank to be. Put the tank in a area of the house which isn't drafty, near a radiator, near a window, in direct sunlight, or near other sources of fluctuating temperatures, for example kitchen areas . Also avoid areas which can get overly hot or very cold. Don't put it in a very busy area, but make sure you can see it enough to enjoy it!
Buy the largest aquarium that will fit in your space, or the largest aquarium your budget will allow. Larger aquariums provide a much more stable environment, because the water chemistry will be easier to maintain over time.
Choose between acrylic or glass. Acrylic will scratch easily but is easier to drill and is much lighter. You can buy a tank pre-drilled, or if you are handy do it yourself (using a diamond bit hole saw). Some fish shops and glass stores will also provide this service. A tank with an "internal overflow" is a big plus. These are often sold as "reef ready". It is better to choose a tank that is not too deep(e.g. 24 to 30") so you can reach the bottom easily; a tank that is wider will provide a better depth of view for a more natural look as well as have better light penetration. A second smaller tank (a sump) is placed under the reef ready aquarium and will hold all the equipment out of sight. A sump is not a need per se, but it is nice to be able to hide equipment in as well as increasing the overall water volume in your system.
Choose between acrylic or glass.
Choose your lighting: Metal halide lamps provide the best lighting for most of the corals commonly kept, other forms of lighting are also obtainable and offer varying degrees of success. 250 watts bulbs will suit most common aquariums except for the deeper ones where 400 w bulbs provide more light penetration.The color spectrum of the bulbs (expressed in color temperature in Kelvins) is a matter of personal preference. Bulbs between 10,000 kelvin and 20,000 kelvin are the most popular, and the higher the kelvin rating the 'bluer' the color. Some claim coral growth is affected by the color, but corals grow fast and successfully on either end of the 'spectrum'. One halide bulb for every 2-3 feet of tank length is usually recommended.
Other types of lights to consider are florescent lighting, specifically high intensity fluorescents. Two popular kinds are Power Compact and T5, or T5HO (meaning T5 high output). These can be found in many of the same color ratings as metal halide bulbs, and are often cheaper and produce less heat than a metal halide. A popular choice is to use both florescent and metal halide. The main thing to keep in mind when choosing a fluorescent T5 fixture is to make sure to buy one with individual reflectors. While the lights do put out a fair amount of light with regular parabolic reflectors, they become amazingly bright using individual reflectors. Many people choose to use a single color of metal halide, like 10000k, and will use a few blue (or Actinic) fluorescents to make the color more pleasing.
Set up the filtration: On a smaller tank (less than 40 gallons) regular weekly water changes can be used in place of a skimmer. If you have chosen to buy a larger tank (40+ gallons) a protein skimmer is a very important piece of equipment to purchase. Get a good quality protein skimmer and place it in your sump or on the back of your tank if it is designed for it. Do not skimp on this. Often protein skimmers are under-rated for the size of tank, so in practice a skimmer rated for a 100 gallon tank is barely adequate for a 50 gallon reef tank (especially one with many fish that get fed a lot). Needle wheel skimmers are a popular choice, and can be very effective for their size/cost. Don't rely on 'venturi' skimmers, unless they are high end models with very strong pumps. Don't bother buying 'canister' filters, often used on freshwater aquariums. Not only are they fairly useless in a marine aquarium environment, they can cause a buildup of Nitrates on their internal media that can negatively effect the aquarium. That being said, a canister filter can be used for carbon or other chemical media, provided it is cleaned on a regular basis.
A skimmer quickly becomes cheaper than salt-water changes.
If the aquarium is not heavily stocked and does not have delicate (or very valuable) fish, try putting the skimmer and even the filter on a timer--though there must always be some circulation such as from powerheads--to allow everything to filter-feed during the day and have its water cleaned thoroughly at night.
Adjust the flow: Now is time to get a saltwater rated pump to return the water from your sump to the main tank. Additional powerhead pumps in the tank or external pump(s) should be installed to provide additional vigorous turbulent flow to otherwise stagnant areas, which is crucial to the survival of your future corals.
Place a heater(s) in your sump, or the rear chambers of your tank.
Consider using an aquarium chiller. The high intensity lighting used in reef aquariums adds a surprising amount of heat to the aquarium, making it harder to keep a reef aquarium 'cool' enough. Although heat issues are not as much of a problem in cooler countries like Canada, you'd be surprised just how much the heat can creep up on a warm day in your tank. The point is to try to keep the temperature variation minimal. The less your temp. varies throughout the day and night, the more stable your marine environment will be.
Fill the tank with tap water partially to test for leaks. Run all your pumps. Turn the sump pump off to see how much water drains into it. Use a piece of tape to mark your "maximum" water line. That is the maximum amount of water that can be in your sump before it overflows. You can also put a piece of tape down for the minimum fill line, which is the minimum amount of water required in your sump to get the pump to work and not blow air into your display. Run the water level somewhere between those two lines. The chamber housing your pump is usually the one in which you will notice a drop in the water level due to evaporation. There are auto top off kits available to top your water off daily with fresh dechlorinated water(no salt). Alternatively, you can top off manually by marking where you want your water level to be and then keeping it full to that line with fresh dechlorinated water (preferably RO/DI).
Prepare enough artificial seawater for the volume needed. Use only a good aquarium sea salt brand and purified water with a Reverse Osmosis or R0/DeIonization Filter. Another option is to fill the tank with RO/DI water and then add the salt. The importance of RO/DI system cannot be understated. Tap water can be used, but your aquarium is then at the mercy of whatever harmful chemicals may be in it. A good RO/DI system is not too expensive, and should be considered a necessity. A 100 gallon per day model is a good choice, because you won't have to wait too long to make purified water which is a nice convenience. If your tank is smaller you can purchase bottled RO water at your local store. Use of distilled water is not recommended as most distillation units use copper pipes. Copper is toxic to most invertebrates; including corals, decorative shrimp, etc.
Once you mix your saltwater and fill your aquarium, turn on all your pumps and let the water 'rest' for a day. It takes a little time for your salt to dissolve and your water chemistry to stabilize, and the action of the pumps will drive out excess carbon dioxide (which initially causes a low pH). You can add sand if you choose to, either before adding your water (if it is not a live bed) or after. If it is a "live" sand bed, add it after you have mixed your saltwater in the tank. Leave the skimmer off until the sand settles. A sand depth of 4 to 5" is recommended for maximal detritus biological processing (at this depth only seasoned hobbyists as at 4 to 5 inches many nasty things can grow as well -research aerobic and anaerobic sand beds for reef tanks).. Some folks prefer the look of the sand bed, but don't want the possible "old tank syndrome" that can come with having a deep sand bed. (Old tank syndrome happens when the sand bed has accumulated more detritus than it can handle and may result in a "tank crash" if pockets of toxic H2S are stirred up in the bed.) A 1-2" sand bed can also be used as long as the detritus is vacuumed out on a regular basis ( this is actually the preferred depth, especially for beginners).
Another way to go is not to add sand at all. This is called "bare bottom". It is much easier to keep the tank clean with a bare bottom, as you can easily siphon out the detritus. It's not as pleasing to the eye perhaps, but for many people, the ease of keeping it clean makes up for that fact.
Add 'live rock' and arrange to your liking, approximately 20% of your volume. The rock can be placed on an aragonite sand bed, or alternatively you can add the rock prior to the sand. Live rock can be obtained online, from other hobbyists or at your local marine aquarium store.
Let the tank "cycle": This means you will need to wait until the water tests negative for ammonia and nitrite. Inserting bits of frozen fish foods in the sand bed can speed the cycle. (This is unnecessary if you added live rock. There are plenty of dead crustaceans and worms already inside due to shipping). This may take 1 to 6 weeks. Algae blooms can be a natural part of the cycle. Check and make sure the salinity is stable at 1.023 to 1.026. This does not mean it can be 1.023 one day and 1.026 the next. Find the salinity you want and keep it at that level. 1.025-1.026 is the optimum salinity for corals; a lower salinity is inappropriate for inverts/coral. A fish only tank can be kept at 1.021-1.026. Compensate for evaporated water losses with RO/DI water. Keep the temperature, Calcium and Alkalinity levels stable. Do not use commercial "supplements" other than water changes unless you know what you are doing. Algae blooms are common for probably the first 6 months of your aquarium, so don't be alarmed to find new algae growing. Just keep it clean and do about a 10% water change every week. Once your tank is stable you may choose to slow down the water changes. Ensure the new water has been heated and mixed for a while in a separate container prior to putting it in your tank.
Add cleaning creatures such as snails and small hermit crabs, and finally reef fish.
If this is your first reef aquarium, get just one to three inexpensive fish that will be compatible with a variety of other fish including any specific exotic kinds you may want later. Being inexpensive means not only that they will not be a big monetary loss if they die, but that they are strong (thus plentiful) and less likely to die. Being few (and small, which tends to go along with inexpensive) means they are unlikely to overload the biological filtration as you start out.
Many aquarists feel its not proper to add corals and anemones until the tank is a few months old. A 'mature' tank is much more suitable for growing coral. A good rule of thumb is to watch your live rock. At some point you will notice your rock or your glass developing spots of purple. The purple encrustation you see is called coralline algae. The right conditions for coralline are correspondent with the right conditions for coral. You will seen new crustaceans, worms, feather dusters, coralline and more. Once you see this marker, assuming your test kits still read 0 for ammonia and nitrite, and less than 20ppm for nitrate, you can begin to add coral.
18 Join a saltwater aquarium community like REEF2REEF and ask a ton of questions and read, read, read!
When it's time to purchase the equipment for your new tank, the first decision you will have to make is whether you will be setting up a fish-only tank or a mini-reef. A fish-only tank is basically self-explanatory: a tank with a single specimen or a community of compatible marine specimens. A mini-reef contains mostly coral (hard and soft), sponges, anemones, and other sessile invertebrates. Fish can be included in a mini-reef, but usually only a small number. Because of their demanding nature and difficult parameters, mini-reef aquariums are not recommended as first-time tanks, and they are usually only kept by mature hobbyists. This article will list suggested equipment for a fish-only tank.
Tank
A fish tank should be made of either glass or acrylic. Glass tanks come in a wide range of sizes and shapes, and they are fairly inexpensive. Also, tanks made of glass are almost completely scratch resistant. However, glass tanks are very heavy and can potentially shatter or spring leaks. Acrylic tanks are extremely resistant to shattering, but they are easily scratched. They tend to be more expensive than glass tanks, but acrylic tanks also provide a superior view with less distortion because they allow more light to enter the tank.
When purchasing a tank, a good rule of thumb is “the bigger, the better.” A larger tank is generally easier to maintain than a smaller tank, because any changes in the water or tank residents will be less dramatic the more water is involved, which will give you a better chance of solving any problem before it gets out of control. When deciding what size tank to purchase, consider how much space is available in your home and how much weight your floors can support. A 55-gallon tank is a great size for a beginner saltwater tank.
Stand
A fish tank will require a stand to keep it off the floor and put it at a height that allows easy viewing and access. Stands made out of iron or metal are not recommended for a saltwater aquarium, as they will quickly rust when they come into contact with salt water. A stand made of wood or acrylic will last much longer. Although it is possible to build your own stand, the stability of a tank stand is extremely important, so a task like that is best left to a master craftsman. A commercially-made stand that is sized to fit your aquarium is a great option.
Substrate
While a substrate is not required in a saltwater tank, and some experts say that it will only trap waste and cause the nitrate level to rise, it does provide a certain esthetic appeal. If you decide to use a substrate in your tank, choose from crushed coral, dolomite, or aragonite gravel. If you’re not using an undergravel filter, fine-grain sand is another option. Do not use the colored variety of gravel that is popular in the freshwater hobby, as it lacks the buffering capacity of marine substrates, and it does not have the look naturally associated with saltwater aquariums.
Rockwork
You will need to choose a variety of rocks to make into an artificial reef wall (for fish-only tanks) or a base for live rock (in a mini-reef aquarium). Some options include tufa, limestone, coquina, and lava rock. The rockwork should be attached to the bottom of the tank (preferably with aquarium-safe silicone) prior to adding the substrate. If you’re using live rock, however, it should be placed in the tank once the tank has been partially filled with water.
Heating
In their natural reef environment, marine fish will experience amazingly stable water parameters, including water temperature. The ideal temperature range for most marine fish found in coral reefs is between 72° and 79°F. In a home aquarium, a temperature somewhere within that range should be established and kept as consistent as possible. The easiest way to accomplish this task is to purchase a heater.
Aquarium heaters are fairly inexpensive and will do the job quite well. Submersible heaters contain a heating element and a thermostat in a small glass tube that can be attached to the wall of the tank with suction cups or hidden among the rockwork in the tank. There are also heaters available that clamp to the top of the aquarium, putting a glass tube into the aquarium and leaving the temperature adjustment dial above the surface. No matter which kind of heater you choose, make sure the temperature settings are easy to read, it can be easily adjusted while still in the aquarium, and it is fairly sturdy and not easily damaged.
When purchasing a heater for your aquarium, you will need to decide how much wattage it will have. Simply put, the higher the wattage of a heater, the faster it will be able to raise the temperature of the aquarium water. You will want the heater to have approximately 5 watts for every gallon of water in your tank (or 3 watts per gallon for a large tank). For example, a 75-gallon tank will require a heater of 250 watts. This wattage can come from one heater or a combination of two heaters.
Lighting
The lighting you choose for your saltwater tank will depend on whether your tank will contain only fish or be a mini-reef tank. Fish-only tanks require no special lighting other than that which will allow for the most optimal viewing of these beautiful creatures. A standard pair of normal output fluorescent lamps should do the trick, with the amount of wattage to be determined by the size of the tank.
Lighting plays a very important and complex role in a mini-reef aquarium. Many marine organisms generally included in such a setup would not survive without lighting of the proper intensity and spectrum, so you will need to provide artificial lighting that imitates natural lighting as closely as possible. As with heating, you will want your lighting system to produce a minimum of 3 to 5 watts per gallon of water.
Fluorescent fixtures and metal halide lamps are light sources commonly used in mini-reef aquariums. Fluorescent lighting is usually more convenient, less expensive to purchase and to operate, and outputs less heat while running. On the other hand, fluorescent tubes can really only be used in shallow tanks (20 inches high or less) because they don’t penetrate the water very deeply.
Metal halides produce an intense light that penetrates much deeper than the lighting produced by fluorescent tubes. However, metal halides get exceptionally hot, which means a tank with this source of lighting will also require a cooling fan to maintain the correct water temperature. Metal halides are also more expensive than fluorescents to purchase and to operate.
For most fish-only aquariums, six to eight hours of light a day is ample. This amount of lighting will give the fish a predictable night and day cycle and allow them to feed by light. Keeping the amount of hours to a minimum will help to save on your energy costs and keep the algae in the tank at bay.
A mini-reef aquarium should be lit for about 10 to 12 hours every day. This schedule can be tweaked according to the way the organisms in the tank respond. Some may require slightly more or less light.
Filter
In the ocean, any waste products that a fish produces are quickly scavenged or diluted. In a home aquarium, these waste products can easily build up with disastrous results for your tank. The solution to this potential problem is adding a filter to your tank setup. There are three forms of filtration: mechanical, chemical, and biological. Mechanical filtration is probably the easiest method to understand. A mechanical filter simply strains out and removes waste from the tank, giving your tank more aesthetic appeal and keeping the water clean. Mechanical filtration can be achieved with a hang-on-tank filter or a canister filter.
Chemical filtration refers to the use of activated carbon to remove dissolved organic compounds from tank water. When activated carbon is placed in a tank’s filtration system, water will flow through the tiny pores in the carbon and dissolved compounds will be adsorbed (not absorbed) from the water, meaning they will form a chemical bond with the carbon, effectively removing them from the system. Chemical filtration can be accomplished by a hang-on-tank or canister filter in addition to mechanical filtration.
Biological filtration is also referred to as "nitrification." Ammonia, which is toxic to both fish and invertebrates, is constantly released into the aquarium water through fish waste or other debris. The bacteria that feed on ammonia quickly begin converting it into nitrite, which is less toxic than ammonia but still very harmful to fish and invertebrates. Next, bacteria that feed on nitrite begin breaking it down into the final product, which is nitrate. Nitrate is toxic to some invertebrates but moderately tolerated by fish.
To remove nitrate from your aquarium (especially important for a mini-reef aquarium), you have several options. First of all, you can purchase a nitrate-removing filter media to try to chemically filter it from the water, but this method does not provide consistent results. You can also attempt to remove it naturally, but the most reliable way to eliminate nitrate is to perform a water change.
In summary, nitrification (biological filtration) is a natural process, but in order to keep it running smoothly, you will need to make sure you provide the special nitrifying bacteria that perform biological filtration (and naturally occur in all tanks) with the food, oxygen, and surface area they need to survive. Without biological filtration, you tank is a disaster waiting to happen.
For more detailed information on mechanical, chemical, and biological filtration, read The Simple Guide to Marine Aquariums (T.F.H. Publications, Inc.).
A basic question facing all hobbyists is what filter should I use for my aquarium. This is not an easy question to answer because it depends on many variables.
When choosing a filter one needs to consider the size of the tank, the type and size of the fishes in the tank, and the time one has to maintain the filtration system. I’m sure considering the tank size and fish is something you have read before but how does one’s time factor into the decision? Quite simply, every filter needs maintenance, some more than others, and if you won’t take the time to do the maintenance then the filtration system will become ineffective. The importance of one’s time will be clear with a few examples.
There are many standard types of aquarium filters. Some of the most common are the undergravel filter (UGF), the outside hang-on-tank power filter and the canister filter. Many people would consider these filters to be equals and would recommend any of them as a filter for your aquarium. However, the undergravel filter is not a complete filtration system. Furthermore, the undergravel filter requires regular maintenance just like the canister and power filters. But in reality how many people really maintain an UGF? In fact, how many people know how to maintain an undergravel filter? Now to the long-term hobbyist this may seem like a crazy question but I have talked to many people with undergravel filters who have no idea what a gravel washer is for. As an aside: if you’re reading this column and work in a pet/fish store, I would ask that when you sell a filter, any filter, take a few minutes and go over with the buyer how to maintain the filter. Conversely, when buying a filter ask the sales clerk about how to maintain the filter. This seems like commonsense but my experience tells me that there are a lot of fish aquarium owners that have little clue on how to maintain their aquarium filter.
Consider the time and problems with maintaining an undergravel filter. The goal is to remove dirt from between the gravel on top of the filter plate so that the water can flow freely through the gravel and contact the nitrifying bacteria which colonize the gravel grains. To do this, one has to siphon through the gravel which can disrupt the decorations and planting. You also have to completely remove the light fixture and glass lid to clean the UGF effectively. Add in that one needs to replace the airstones, the air pump diaphragm, clean the inside of the lift tubes and replace brittle airline tubing and this starts to sound like work! This is why I feel that most aquarium owners with undergravel filters, who know better, still don't maintain them. Human nature is such that we put-off those tasks that we don’t like for as long as possible.
Does your thinking that an undergravel filter is your choice for that new aquarium change when you consider the time and hassle factor of maintaining it?
Contrast the UGF with the modern power or canister filter. The hang-on-tank power filters that are available today are engineering marvels when you consider that for less than $70 in most cases, they run 24 hours a day, 365 days a year with little trouble and cost only pennies a day in electricity to operate. One can have a successful aquarium with a power filter as the only filtration system. Service is convenient and takes only a few minutes a month. Plus servicing can be done without having to remove the light fixture or the lid.
In general, hang-on-the-tank filters are for someone looking for an easy to use, effective filter that will need some routine maintenance such as changing the pad. Fortunately, changing the pad is easy for most hang-on filters and takes less than 5 minutes. The old pad is lifted out of the filter and thrown away, a new pad is taken out of the box or bag and slid into the filter. In most cases, the filter does not have to be turned off. How often the pad will need to be changed depends on how much food is put in the tank and the number of fish in the tank. Every once in a while a more thorough cleaning of the filter should be done. This means cleaning the inside of the intake tube, cleaning the impeller and the area where it sits, and cleaning the filter box.
Canister filters are generally more complex than a power filter but they still have many convenient features and can be serviced in 15 minutes or so. The features that distinguish a canister filter from a hang-on filter are they generally contain much more media. Most canister filters can hold 12 to 15 oz of carbon versus only one or two hang-on filters with that capability. In the same aquarium situation, a canister filter will generally run longer between cleanings than a hang-on filter.
The drawbacks to canister filters include the continued reduction in water flow as the filter clogs. As the filter traps dirt, less water will make it through the filter which means a lower flow back to the tank. In extreme cases of filter neglect, the flow back to the aquarium will be completely cut-off. This is in contrast to the hang-on filter which will always pump water back to the aquarium but that water may not be filtered. Cleaning a canister filter is more involved than a hang-on filter. To clean a canister filter it must be taken apart which means dealing with the hoses, valves, pump and other parts of the unit. While not difficult, cleaning a canister filter is more involved than cleaning a power filter.
Which filter you should use depends upon the type of aquarium you plan to set-up and the way you approach filter maintenance. No one filter will be the best for every case, conversely none will maintain water quality if they are not serviced. If you want a simple filtration system for an aquarium that will not be overstocked or overfed and you are willing to do monthly filter maintenance, then the hang-on-the-tank filter is probably the filter for you. Change the filter pads at least monthly and every other month clean the entire unit. The time needed for maintenance is minimal but it must be kept in mind that the system cannot be overwhelmed with fish or food.
If the tank you want to set-up is large and/or is going to have a lot of messy fish then a canister filter is the one for you. African cichlid tanks and goldfish aquaria are examples of aquaria that would commonly be filtered with canister filters. If you are rather lazy about performing filter maintenance (you’ll do it but probably every other month) then a canister filter is a good choice. It will provide a lot of filtration capacity and can be abused more than a power filter.
Finally, to correctly answer the question of which filter is best for your aquarium you have to be honest with yourself. How much time are you willing to allocate to servicing the filter? If the answer is “as little as possible” then get a power filter with easily changeable filter cartridges. If you think the filter is too complicated don’t buy it; you’ll probably not service it often enough. Go with something simpler that you understand. Don’t be intimidated by a sales clerk who is trying to sell you the latest cutting edge filter and don’t, for a second, consider a filter which claims it does not need servicing! Lastly, make sure you understand how the filter works and what you need to do to clean it before leaving the store.
So what filter is the correct one for your aquarium - the filter that you’ll maintain on a regular basis (and don’t forget the partial water changes).
Different plant species have different requirements when it comes to lighting, and researching the species you are interested in is therefore really important. Many aquarists claim that planted aquariums are really difficult to keep, since they purchase plants that look good without putting any effort into learning how these plants should be cared for. It is not hard to understand why these plants rapidly wilt and die in the aquarium, and why the aquarist believes that planted aquariums are “impossible” to keep.
Strength
As a rule of thumb, planted aquariums should get 0.5-1.0 watt of fluorescent light per liter of water. Generally speaking, a 50 liter aquarium with standard dimensions will therefore require 0.5 watts x 50 = 25 watts. This rule has to be modified if you keep really high demanding or low demanding species, if your aquarium is very deep, or if your aquarium is really densely planted.
Incandescent or fluorescent?
Incadenscent lighting is still quite common, especially among beginners. There are many low demanding plant species that will do well with nothing but incandescent lights, but the problem is that incandescent lights tend to become really warm. This will affect the water temperature in your aquarium. Incandescent lights also consume a lot of energy and do not last very long. Investing in fluorescent lights can therefore save you money in the long run.
Color temperatures
When purchasing fluorescent lights from a well stocked lamp store, you may stumble over a wide range of different color temperatures. Different color temperatures are good for different purposes. If you are a novice plant keeper, stick to bluish (white) and yellow (warm) lamps.
Day length
Try to mimic the natural day length in the environment from which your plants hail. Many popular aquarium plants are tropical species and are therefore used to 12 hours of light per day. If you keep temperate species, give them at least 14 hours of light each day during the summer and no more than 10 hours per day during the winter. Keeping the lights on 24/7 will only aid algae growth and may also disturb your fish.
Carbon Dioxide (CO2)
Without carbon dioxide, plants cannot perform photosynthesis, the process where they turn light energy into energy that they can use (sugars). Most plants will do well with the carbon dioxide produced by breathing fish and other animals in the aquarium, but there are of course exceptions. Some aquarists use CO2 injections to promote plant growth. This can produce wonderful results when balanced with sufficient lighting and necessary nutrients. Even plants that would survive without any additional CO2 can start growing much more rapidly when they receive extra CO2. CO2 can come from fermentation or from a gas cylinder filled with liquid CO2.
Fermentation
Producing CO2 through fermentation is actually quite straightforward and can be carried out even by aquarists on a limited budget.
You will need a 1.5-2.0 liter plastic bottle.
Poke a hole in the cap and let an airline tube run through it. (The attachment must be airtight.) The airline should ideally have a non-return valve.
Fill half of the bottle with water.
Shake in ½ cup of sugar and ½ teaspoon of baking yeast.
Secure the cap and wait for the fermentation process to start. It should be up and running in no time, just like when you bake a loaf of bread.
When gas starts to evaporate through the airline, attach an air stone to the tube and place it in the aquarium.
The fermentation process will normally provide the aquarium with plenty of carbon dioxide for at least two weeks.
Nutrients
Just like terrestrial plants, you aquarium plants need nutrients to survive.
In addition to the elements mentioned above, plants need trace elements of many other elements as well. If you fail to provide your plants with all necessary nutrients, it can lead to stunted growth, yellow leaves or even prove fatal. So, how can nutrients enter the aquarium?
Nutrients are present in tap water and well water.
Nutrients are present in fish food (and will therefore also be excreted by fish).
Nutrients are present in potting soil and aquarium substrate.
You can purchase special fertilizers intended for aquarium use.
Before you decide on using fertilizers, keep in mind that simply filling your aquarium with a lot of fertilizers will not aid plant growth. Fertilization must always be balanced with light and carbon dioxide. It is also very important to purchase a special aquarium fertilizer, since fertilizers for terrestrial plants contain too much nitrogen which will cause algae growth and injure the fish.
Substrate
Some aquarium plants must be planted in the substrate or in pots, while others grow attached to rocks, driftwood etcetera. There are also floating plants and plants that can grow in several different fashions. If you want to keep plant species that need a substrate to grow in, ideally chose a substrate where the particles are 1.5-3.0 mm. There are naturally exceptions to this rule, but many plant species can not tolerate finer substrates since their roots cannot handle anaerobic conditions well. When the particles are 1.5 mm or bigger, it is easier for water to circulate which prevents clogging.
When it comes to substrate depth, the requirements vary a lot from species to species. The popular Amazon Sword (Echinodorus bleheri) will for instance grow quite big and need to be rooted in at least 8 cm of substrate.
Preventing disease
Only buy plants that look healthy.
Do not buy plats from aquariums where the fish seem unhealthy. Plants can carry malicious microorganisms and infect your fishes.
If you want to be even safer, sterilize the plants before you place them in your aquarium. You can for instance use a dilute solution of potassium permanganate (provided that you have plant and fish species that can handle traces of potassium permanganate). Keeping a plant in potassium permanganate for 10-15 minutes will kill most malevolent microorganisms.
Remove all damaged leaves before planting. It is better to remove a lot of leaves than allow them to decay and pollute the water.
Do not panic if most leaves die, turn yellow or dissolve after planting. The shock of being repotted can make plants lose their leaves, but they will grow new ones.
Didn't find the info you were looking for? Register for free and ask your question to our Site's staff.
Our knowledgeable staff usually responds to any question within 2 hours
Put very simply, algae are a greenish/brownish growth that forms along the walls of your aquarium, or on plants and aquarium decorations. Algae are mostly chlorophyll producing photosynthetic organisms that resemble plants a lot. Contrary to plants, algae are single celled and are therefore not really plants. Excessive algae growth can be very frustrating for aquarists, especially for beginner aquarists and for those that have recently installed stronger lights. Since fish provide enough food for plants to grow, the chlorophyll filled algae too find your aquarium a safe breeding ground. Algae look ugly, and are difficult to eradicate completely. A small amount of algae is a natural part of the ecosystem and can even be an appreciated food source for many fish species. Once a thick carpet of algae forms in your aquarium, they will however begin to compete viciously for all the nutrients that your aquarium can provide. The "Algae Bloom" plagues almost every aquarium at one time or the other. Algae grow fast, especially when there is a regular supply of warm sunlight and rich nutrients.
Before we start off, it is necessary to know some inevitable facts about the relationship of an aquarium with algae. If you have an aquarium, then algae are inevitable. Algae can even be beneficial. When nutrient levels are very high in your aquarium, the algae consume the extra nutrients, thus making the water healthier for your fish. Algae also indicate that the ecosystem within your aquarium is healthy. Do not resort to chemical controlling of algae if you can get by with the natural method. If you try to chase away your algae too regularly, you will be causing too much of stress for your fish.
There are several types of algae. The main categories include:
- The Green Algae
- The Blue-Green Algae
- The Red Algae, and
- The Diatoms
The filamentous green algae form long green threads. These need abundant sunlight to flourish. They can be very damaging to plants as they rob them of vital nutrients. Filamentous green algae can be controlled by algae-eaters or by physical removal.
The suspended green algae look like green water. Large and frequent water changes will help to get rid of these. It will sometimes be necessary to use algaecides.
The green spot algae form round spots on leaves and on the glass. Snails and algae eating fish can be used to remove these.
The blue-green algae are much more harmful than the green algae types and produce substances that are toxic for fish. Excessive illumination and high nitrate and phosphate levels create an ideal environment for these algae. Fish do not eat blue-green algae and the best way to get rid of these algae is a week of total darkness in the aquarium. Several water changes are also a must to get rid of them.
Diatoms form a layer of a brownish slime like substance on rocks, glass and plants. They are quickly eaten off by algae-eaters. They also subside when lighting intensity goes up.
Since Algae are unsightly and parasitic, it is necessary to keep their count low. There are some things that you can do to hamper the growth and spread of algae. The first and most important step is REGULAR water changes. Nothing can help you more than this. Remember, the reason you do not find algae floating in running streams is because the water in the streams keep changing at least a hundred times a day. Excess algae growth will instead be found in pools and puddles where the water is still. We can simulate nature very poorly when we change 20% of the water twice in a week. Change a little of your water as often as you can, and much of your algae problems will be solved.
At least once a month, take a special kind of aquarium scrubber and clean the glass of your aquarium completely. Some rocks contain certain minerals that will cause algae to grow rapidly. If you feel this could be the reason, remove the rocks immediately. Most algae need lots of sunlight. Keeping sunlight levels down, and using fluorescent lighting most of the time is also a simple way to keep the algae growth to a minimum.
New plants that come into your aquarium need to be treated to prevent algae from entering your aquarium. You can use Potassium Permanganate or Alum to treat your new plants. After soaking the plants in this for about 10 minutes, they should be rinsed thoroughly and then planted. Also remember to remove any weights or ties around the plants that you brought home. You should clean the fake plants or decorations in your aquarium by soaking them in a 1:20 solution of bleach to water for a few hours. These then need to be soaked in dechlorinated water. If you will be emptying out the entire contents of your aquarium, it is a good idea to soak your entire aquarium in fresh water with a dechlorinator.
Using algae-eating fish species and grazing snails will greatly help to keep down the amount of algae in your aquarium. As mentioned earlier, introducing algae-eaters as the first fish in your aquarium will greatly help to keep the algal growth at bay from the very beginning. These fish will eat the algae that grow on the sides of the aquarium and on the leaves. Snails will also help to keep the sides of your glass aquarium clean. Algaecides are the chemical way to get rid of algae, but they work on a limited type of algae only. Using natural methods of control are a much better option.
Didn't find the info you were looking for? Register for free and ask your question to our Site's Staff !
Our knowledgeable staff usually responds to any question within 2 hours
The first and most basic needs of a plant are sufficient amounts of light, oxygen and carbon dioxide. Nutrients like iron, copper, zinc etc are also required in trace amounts. As described earlier, these can be provided through the use of various fertilizers and additives. There are certain things besides these that will be beneficial to plants.
Thinning and pruning of plants is very important for them to grow well. Many aquatic plants will flourish if proper conditions are provided. The taller plants will grow right out of your aquarium. They will also become too thick and block sunlight, and take up too many nutrients. After pruning, many plant species can be replanted since the cut-off parts are capable of growing into a new plant. In some of the leafy plants, like Swords, older and bigger leaves will need to be removed to provide sufficient light for the younger ones. Some plants that have floating leaves also need their leaves removed. These will otherwise block the sunlight from the lower leaves as well as from other plants. After several pruning sessions, you will sometimes find that the branches are becoming too dense. Such plants can be thinned by removing the older branches.
Here are some tips for basic aquatic plant care:
- Be careful when you select your plants. For your first aquarium, it is advisable to go for the popular varieties that are easily available.
- Young plants that are in good condition have greater chances of survival.
- Be very thorough while planting your plants. Enough spacing and anchorage are important.
- Plants should be groomed before you put them into the water.
- Before planting, any dying roots should be removed. Otherwise, they will rot in the substrate. Decaying or dying roots will appear dark brown and limp, while the healthy roots will be rigid and pale.
- Remove any yellowing or sickly leaves on your plant before you put it in. The plant will ultimately shed these leaves anyway and they can pollute the water and consume oxygen.
- Protect the leaves of your plants from unnecessary damage. Snails and plant eating fish should be kept to a minimum.
- If you intend to put in tubers, then position them at an angle, so that the growing tips of the plants will be exposed to water.
- Once your stem plants reach the surface, cut them and replant the cuttings. They will soon grow a new root system. This will also give the younger leaves enough sunshine.
- Some plants like the Java Fern and the Java Moss will do better if they are attached to rocks, rather than planted into the substrate.
Plants are good indicators of nutrient deficiency in your aquarium. One way to keep your planted aquarium running smoothly is to measure the nutrient level in your water by analyzing plant growth. In aquariums with low growth, plants do not show many deficiencies because the nutrients present are quite sufficient for them. In high growth aquariums where you have lots of plants and where you are using Carbon Dioxide injections, plants are growing so fast that nutrients may get depleted. In such an aquarium, it will typically be the fastest growing plants that show the first symptoms of deficiency.
The first thing you must ascertain while looking for nutrient deficiency is to see whether the symptoms are showing up in the older leaves or in the younger, fresher leaves. This will help you narrow down the nutrient causing the problem. "Mobile" nutrients are those that the plant can re-claim from the older leaves and use while producing younger leaves. So, deficiency in these nutrients will usually show up in the older leaves. Mobile nutrients include Nitrogen, Phosphorous, Potassium, Magnesium and Zinc. The immobile nutrients do not move, and their deficiency therefore usually shows up in the younger leaves. Examples of immobile nutrients are Copper, Iron, Calcium and Sulfur.
Though analyzing nutrient deficiency using leaf changes is not an exact science, here are some symptoms and causes that will help you. Deficiency in Iron usually causes the leaves to become brittle and pale. If the older leaves show pinholes that gradually enlarge, it may be a Potassium deficiency. Twisted and bent or cupped leaves with yellowish to very pale edges are an indication of calcium deficiency. Withered edges and dead leaf tips show a deficiency in Copper.
Though the aforementioned list is not very exhaustive, you will find that this provides a general guideline to check for nutrient deficiency. With time and experience, you will find your plants speaking to you about the ecosystem within the aquarium. Moreover, if you take them seriously, plants will flourish and thrive in your aquarium. Your fish will benefit a lot from this too.
Didn't find the info you were looking for? Register for free and ask your question to our Site's Staff !
Our knowledgeable staff usually responds to any question within 24 hours
Before you start planting your aquarium, it is a good idea to have a rough sketch of what kinds of plants you will put in. Plants can be categorized depending upon how tall they grow.
Foreground plants are species that are quite short and small. They mostly form carpet-like matting at the bottom. They do this by producing numerous runner plants. These plants are often used in shallow aquariums because they need plenty of strong light. Glossostigma sp. is one of the most popular carpet plants around. It is not very easy to grow but looks absolutely stunning. Water Wisteria can be used a carpet plant too, if you put some stones on the stems till they catch root. The middle ground plants are taller than the foreground plants. Their main use is in hiding the stems of the background plants that are much taller. The background plants grow quite fast and can be used effectively to hide all the accessories in your aquarium. They usually need lesser sunlight too.
Bunch plants – plants that look good in a group – are usually middle ground or background plants. Some plants, called the specimen plants, are large decorative species that are usually highlighted at the center. Floating plants are an attractive option, but care must be taken to place floating plants away from the heat of the light bulb. Floating plants also propagate very quickly and may block out all the light in your aquarium.
Java Moss and Java Fern are some of the most common aquatic plants and they are very suitable for beginners. Initially, Java Fern should be attached to a piece of driftwood or rock. After the roots are formed it will stick to its surface. Java Moss and Java Fern are very hardy plants that can thrive in a wide range of soft and hard waters and even do well in a brackish aquarium. These plants will also tolerate a lot of different pH-values. New plants form on the older leaves of existing plants. The new plants will break themselves off from the original plant, but can also be cut away. These shoots can then be replanted. They grow quickly and give a very lush appearance to your aquarium.
The Amazon Sword is another very popular aquatic plant. Just like Java Moss and Java Fern, the Amazon Sword is a very hardy plant that is popular both among beginners and expert aquarists. Amazon Sword grows pretty fast and therefore prevents algae formation.
Wisteria is yet another example of a beautiful and undemanding plant that is suitable for your first aquarium. The plant grows quickly and also helps to inhibit algae growth. But Wisteria also sucks a lot of nutrients from the water. Pale leaves indicate that there is a shortage of nutrients in the aquarium, and that fertilizers need to be added to the substrate. The Anubias Nana plant is also popular among beginners, since this plant thrives in virtually all conditions. Best results are obtained by tying the plant to a tree root or stone. This plant often flowers in water and is usually left alone by herbivorous fish. If your aquarium is provided with strong light, you can keep Lillaeopsis. Lillaeopsis looks more or less like grass. It grows fast, but does need bright lighting and can therefore be an unsuitable choice for your very first aquarium before you have learned how to control the algae. If you want to keep an amphibious plant, you can try the Cryptocoryne Beckettii. It is a popular plant among aquarists and it grows really well when it is submerged.
Beginners must take some factors into mind when they select plants. Since you are new to the whole concept, it is best to stick with plants that are not very exotic or pricey. As a rule of thumb, very colorful plants are unsuitable for beginners and green plants are a better choice. This is mainly because colorful plants typically require more direct light. Providing this light may play havoc with the temperature and algae levels in your aquarium. If you are not equipped with enough know-how and experience in dealing with these situations, you will find that your aquarium will turn green with algae in no time. Availability is another matter to consider. Some plants propagate themselves and give off shoots that will develop into new plants. Such plants are usually available in most pet shops since they are easy to grow. You will also be able to plant new shoots without spending more money. Plants that are not easily eaten by fish are also good for the beginner.
Didn't find the info you were looking for? Register for free and ask your question to our Site's Staff !
Our knowledgeable staff usually responds to any question within 2 hours
Most hobbyists are quite naturally drawn to making their aquarium look as natural as possible. Adding plants is one of the better ways to make your aquarium look stunning. Plants have some obvious advantages when it comes to looks as well as use. Most viewers are stunned by the beauty of lush green plants that grow abundantly in water. As described earlier in this e-book, live plants have a much more serious role to play in your aquarium than being mere decoration. The plants provide a hiding place for the fish too. So, you will find that many fish species are happier and more relaxed around plants. Plants will also produce oxygen and use up the nitrogenous wastes that the fish give out. This alone makes them desirable in your aquarium.
Natural plants have some inherent negative aspects. You should be aware of these before you decide whether you want to keep them in your aquarium. Keeping real plants in your aquarium requires an equal amount of dedication as keeping live fish. Plants need to be maintained, nurtured and propagated. Dead and decaying parts will need to be pruned and cut off regularly. Real plants may also introduce snails and hydra into your water and they can be the transmitter of fish infections too. If your fish love to nibble on the plants that you have decided to put in, you will have a hard time keeping these plants alive. Real plants require some particular kinds of nutrients, fertilizers etc. That means you will have to go in for a particular combination of materials in your substrate. When the substrate becomes old, you will have to change it or fertilize it. A planted aquarium with real plants generally needs more light than a fish-only aquarium, since fish do not rely on photosynthesis. Without sufficient lighting, your plants will not be able to generate oxygen and can even begin to die and decay.
If you do not have that much of time for the aquarium just at the moment, you can go in for fake plants. There are numerous gorgeous looking fake plants available in the stores. Fake plants are of course much easier to keep. And hopefully, your fish will not develop a taste for it. A combination of fake and real plants can also be a good solution and give a more natural look to your aquarium. Maintenance will be less because a large chunk of your plants will not need to be maintained. When you select fake plants, it is usually better to choose silk plants rather than plastic plants. Silk is easier to clean if you need to scrub out algae. Plastic plants tend to fall apart while cleaning. This will however vary from manufacturer to manufacturer and high quality plastic plants can still be a good choice.
So, why put in live plants at all, when you can have equally beautiful artificial plants? After all, artificial plants are so much easier to look after and maintain. And they NEVER wither or die. Well, here are some very valid reasons to go for live planting, at least partially, in your aquarium.
- Oxygen, the byproduct of photosynthesis, is a necessary ingredient for any fish aquarium to thrive.
- In addition to keeping Carbon dioxide levels low, plants also keep a check on the nitrogen levels, thus protecting your fish.
- The natural surroundings that the plants provide give the fish in captivity a sense of freedom and security. This is especially important if you plan on breeding your fish.
- Plants are a source of food for many species of fish, provided of course that they do not nibble away too much and kill the plant.
- Plants also help to keep your substrate in place, especially if you are using sand at the bottom. The tiny root systems of the various plants help to anchor the substrate to the bottom of the aquarium.
- Small amounts of algae are a natural part of an aquarium, but excessive algae growth can be an aquarist's worst nightmare. Real plants inhibit the growth of algae by releasing certain chemicals. They will also compete for nutrients, since they live on the same substances as algae.
Plants are also a sure shot indicator of the health of your aquarium. Unfavorable conditions within your aquarium will typically first affect the plants, and this will warn you that the fish will soon be sick too. This helps you to take timely precautions and emergency protective measures.
Before you can make up your mind regarding the kinds of plants that will go into your aquarium, there are some style statements that you should know about. There are two main planting styles that have evolved among aquarists over a period of time. A quick overview of these styles and their usability will help you decide which way you want to go, or if you want to think up something entirely different.
The natural style: As the term suggests, the natural style is just that - natural. Here, we strive to mime nature as closely as possible. Introducing a variety of plants without any particular order is the most important thing in this style. Think natural - in nature, you would not find groups of similar plants sitting pretty in some order. The aim is to cultivate a 'wild' look. It may seem that no planning goes into this kind of style, but this is far from the truth. Plants may seem to be placed at random without any serious coordination, but to achieve that striking display of 'wilderness' in your aquarium, you need to sift through the various plant varieties, and pick and choose the right ones.
The Dutch Style: This style is for the more serious planters. The aquarium is more for the plants, and the fish seem to be added in as an afterthought. You will hardly find these kinds of aquariums with superbly colored fish. There will just be a few colorless fish hanging about. The style tries to replicate a verdant garden, in all its green glory. An important element in this style is terracing or layering. You will find that the aquarium is divided into terraces, with different kinds of plants growing on different layers. The back of the aquarium will be higher than the front. The plants are the main focus of this display.
There are two ways in which you can adapt the natural planting style to your aquarium. Firstly, there is the open style aquarium. In this kind of aquarium, the top of the aquarium is left open most of the time. The plants are allowed to grow right out of the aquarium. The tops of the plants are never trimmed. You need to be extra careful when you keep an open aquarium. If you have any jumpers in this aquarium, you will find that you are poorer by a number of fish after some time. An open aquarium is therefore not suitable when you keep such fish species.
A habitat aquarium can also adopt the natural style. The habitat aquarium is one in which you place ideally suited species of fish and plants that have the same requirements. A habitat display will take plants and fish from some particular geographical location, and mimic their ecosystem.
You can categorize the natural plants that should go into your aquarium depending upon their behavior. Very broadly, there are three kinds of underwater plants:
- Plants that float at the top of your aquarium
- Plants that will stay firmly rooted to the bottom
- Plants that come in a bunch and keep moving or floating around
Keep in mind that you cannot put in just any plant. Common household plants should naturally be avoided. Any plant that is not a water plant is bad news in the long run. They may adapt to the water initially, but may not be able to cope with their surroundings after a period of time. Changing your set up after some time is not very easy, and plants also take time to adapt and grow.
Didn't find the info you were looking for? Register for free and ask your question to our Site's Staff !
Our knowledgeable staff usually responds to any question within 2 hours
Aquarium plants require carbon dioxide. They will for instance get carbon dioxide from what fish and other animals excrete during breathing.
Aquarium plants require oxygen, since their cells burn sugars just like animal cells. Oxygen will be dissolved in the water. Oxygen is also a bi-product of photosynthesis, which is carried out by the plants themselves.
Aquarium plants require so called macro nutrients. Of these, nitrogen, phosphorus and potassium are the most important ones. Plants must however also get ample amounts of hydrogen, calcium, magnesium, sulfur and iron.
Aquarium plants need certain micro nutrients, including boron, copper, chlorine, manganese, molybdenum, zinc, and possibly sodium. Most plant species will receive adequate amounts of micro nutrients from the water, from the substrate and from the food you feed your fish.
Sources of aquarium plant nutrition
Tap or well water
Some aquarists only use distilled water, or let the water go through extensive deionization and/or reverse osmosis before they use it for their aquariums. A problem with this approach is that you risk removing plenty of beneficial nutrients from the water. For a beginner hobbyist, using normal tap or well water is therefore a better idea. Those who use heavily treated water are normally advanced aquarists that know how to add the necessary nutrients afterwards. If you are not, do not let anyone lure you into buying expensive “special water”. Ask a reputable fish store to test your tap or well water and see if it is fit for aquarium use and the species you wish to keep. Aquarium substrate
Aquarium substrates are normally filled with ample amount of plant nutrients in forms that can be readily absorbed by your plants. Different plants have different preferences, and this can be a good idea to take into account before you set up an aquarium. Aquarium gravel can be enhanced in several different ways, e.g. by mixing it with nutritious clay or by using artificial fertilizers for aquarium use.
Fish food
Every time you add fish food to your aquarium, you add nutrients. (This is one of the main reasons why an aquarium can never be a closed and perfectly balanced eco-system.) Some nutrients will dissolve in the water or sink to the bottom and be directly consumed by the plants. Other nutrients will be eaten by fish first, and then expelled in the form of fish feces than can be used by the plants.
Artificial fertilization
There are many different types of aquarium fertilizers available today, including liquid fertilizers, granular fertilizers and pellets. Liquid fertilizers are ideal if you have a lot of floating plants and plants anchored to aquarium decoration. Granular fertilizers and pellets will work during a longer period of time and is a good choice if you have a lot of plants planted in the substrate.
Always get aquarium fertilizers, because terrestrial fertilizers can poison the entire aquarium. Terrestrial fertilizers do not match the needs of aquatic plants and the aquatic ecosystem. It does not matter if the terrestrial fertilizer is artificial or natural (uera, bloodmeal etc), it will bring on mayhem either way.
Before you start using artificial fertilizers, keep in mind that fertilization, lighting and carbon dioxide must be balanced if you want to achieve optimal plant growth. Boosting one single factor will not produce any desirable results, and may even cause problems for the other inhabitants of the aquarium.
Water circulation and water changes
Water circulation and water changes are important for plants, since it provides them with new nutrients. In the wild, currents, rains, flooding, etcetera continuously provide water circulation and water changes in most habitats. Plants from such habitats will therefore appreciate regular water changes and some type of current/water movement in the aquarium.
Temperature, pH and water hardiness
Temperature, pH-value and water hardiness are three factors known to affect the amount of available nutrition and how easy it will be for the plants to absorb and make use of that nutrition. You should therefore avoid mixing plant species that want very different temperatures, pH-values and water hardiness levels. Check temperature, pH-value and water hardiness regularly and make sure that the figures stay within the recommended range.
Didn't find the info you were looking for? Register for free and ask your question to our Site's Staff !
Our knowledgeable staff usually responds to any question within 2 hours
Plant growth are affected by a long row different factors among which the most important are listed below.
Water
The first consideration would of course be the water in which the plants will grow. The kind of water you that you have and the temperature in you aquarium all play an important part in your plant life. Most aquarium plants found in marshes do well in warmer temperature, and 75 degrees Fahrenheit is usually the ideal temperature for most tropical plants. It is seen that plants flourish even better if the heat generated is from the bottom so that their roots get enough heat. This can be achieved by placing a submersible heater right at the bottom of the aquarium where the water meets gravel. Another way to keep your plant life healthy is by leaving their roots undisturbed. When you are cleaning your aquarium or changing water, care must be therefore be taken that the roots do not get disturbed. The reverse is true in case of the leaves. Plants seem to do well when their leaves move more. Therefore, regularly aerating your water using bubblers is a good idea. Just like fish, plants also need fresh supplies of water frequently. This is one more reason for making frequent water changes, but keep in mind that you should only change small parts of the water at a time.
Lighting
Since photosynthesis takes place in the presence of light, light is a necessity for healthy plants. Natural sunlight is made up of a number of light waves that have different wavelengths. The plant pigment chlorophyll will absorb only certain light waves.
Sunlight will promote the growth of algae. Long exposure to sunlight will also heat up the water. Artificial light is therefore more advisable for plants growing in a aquarium. Full spectrum or broad spectrum fluorescent light is best suited for plant growth. Aquariums usually need about 1.5 watts of light per gallon of water and about 12 hours of light per day. Of course, if your aquarium is deep, you may need additional wattage, and need to keep the light on for longer hours. Using light colored gravel is a good way to create a light bottom for a deep aquarium.
The wattage of light required for healthy growth in plants is also species dependent. Some plants, like the Anubias, Java Fern and Java Moss, require only low to moderate lighting. So, a single fluorescent tube will give enough light for these plants. The Water Wisteria, the Indian Fern, the Water Lily, and the Waterweed are some plants that need bright light. These plants will require at least one additional fluorescent tube to survive and flourish. Some species like the Bacopa and the Cabomba require extra strong light. These plants are of course not very suitable for beginners. Plant Substrate
In nature, plants are continuously receiving nourishment from their surroundings. Aquarium plants derive nourishment from the substrate. There are different varieties of substrate available now, but for the beginner a substrate that is low maintenance and stable is the ideal choice. A substrate that needs constant watching and gets messy is not recommended. Similarly, a substrate that is capable of changing the water chemistry is also something to keep away from. This kind of substrate will require constant monitoring of the water. Organic substrates, rich in nutrients, will mess with your water quality and give out excess nutrients.
Since the substrate lies at the very bottom of your aquarium, it is difficult to change it once the aquarium has been established. So, in many cases you are stuck with your substrate for a long time. That is why you need to be wise when you choose it. Ideally, you should select a substrate that is inert and that will not alter your water chemistry. The perfect substrate will also have a high Cation Exchange Capacity. The Cation Exchange Capacity refers to the ability of the medium to absorb nutrient ions. Simply put, this means that your substrate will hold on to the nutrients and make them available to plant roots.
In this respect, sand is a very poor substrate. It has none of the qualities described above. It can be used only as an anchor for your plants. Gravel will usually also have a very low Cation exchange Capacity and some types of gravel will alter the water chemistry.
Fluorite is a great substrate. Though it is a bit expensive, it is very nice looking and nutrient rich. It will not get soft when in water. It also has iron and other trace elements that are good for your plants. Vermiculite is a soil additive that is very rich in nutrients, but it is also very light and needs to be placed below a layer of heaver material. Otherwise, it will start floating around and make your water cloudy.
Using suitable additives in your substrate will be beneficial to plants. Commercially available products help to induce plant growth. Some of these are to be mixed in with water, while others need to be pushed in near the roots of the plant. You will find more detailed information about plant nutrients later in this e-book.
Do NOT use peat moss, bagged potting soil or compost in your substrate. These will decay after some time and prevent root growth in plants. A soil that has only a little organic matter and has a higher concentration of fine clay particles is best suited for plant growth.
Plant Nutrients
Both micro and macro nutrients are required by plants for growth. Macronutrients include nitrates, sulfates and phosphates. The plant requires these in large quantities. If you introduce a lot of macronutrients to your aquarium, it can lead to an undesirable 'algae bloom'. Micronutrients are nutrients required in trace amounts. Nutrients like iron, copper, zinc and calcium are some of these. Excessive amounts of these can prove harmful for the plants.
Carbon Dioxide is the most important nutrient that a plant needs. Sometimes, fish alone are not able to provide the optimum levels to support adequate plant growth. Carbon dioxide injections for your plants are an easy but pricey way out. Carbon dioxide levels in your water should be between 5-15 Mg/l. If you go any higher, your fish will be harmed.
Using commercially available tablets that dissolve in water and provide a lot of nutrients for your plants is also a good idea. Unless you feed your fish a lot, they will not provide all the nutrients that your plants need. And even if the fish produce enough nutrients, these are available to the algae and other microscopic organisms too. Plants can have a hard time getting it. That is why using additives in the substrate as well as tablets in the water really assist plant growth. When using additives, take special care that they are not harmful for your fish.
The use of aerators is also a factor in the growth of your plants. Constantly keeping your air pumps or bubblers on will deplete the carbon dioxide levels in your water. On the other hand, you need the aerators to keep your water rich in oxygen. The easy way out is to turn on the bubblers only for a few hours a day, preferably at night. This will provide enough oxygen for your fish while not depriving your plants of the vital Carbon Dioxide. Keep in mind that plants require oxygen too.
Plants will suffer when there is a deficiency in the nutrients. A deficiency in nitrogen and sulfur is indicated when the leaves turn yellow faster than usual. If the leaves seem to be very brittle, you probably need more iron in your aquarium. Over fertilization may lead to problems too. The leaves getting yellow spots can indicate an excess of iron, zinc or copper.
Filtration
Almost any kind of filtration system will do for plants. Only a few things have to be kept in mind. Constant use of aerators should be avoided. Use a filtration system that will filter out floating particles. These particles will block sunlight and also form a deposit on plant leaves. The filtration should not produce too much of water disturbance, as this will deplete Carbon Dioxide levels. On the other hand, the filtration must create some currents in the water, as this will help easy circulation of nutrients.
Didn't find the info you were looking for? Register for free and ask your question to our Site's Staff !
Our knowledgeable staff usually responds to any question within 2 hours
Hello and welcome to ourAquarium-loving Site. We have many helpful posts and articles and we want to help you finding them easier. First of all, you can use the our Site's "Searching Engine" and type the word (words) of what you are looking for (e.g. "Aquarium Plants"). Second, when you finish the "1st Article Page", there is a "link" below the last article-> "Older Posts". You click on that and it automaticly "moves" you to the other/older Articles. If you are facing any difficulties, please contact us and we'll help you with anything that bothers you.
Choose Language
Find our App for iPhone and Android
Advertisements
Views
Designed and Developed by: Στέφανος Νούτσος (Steven Noutsos). Powered by Blogger.


